

recombinant adeno-associated viruses (rAAV)
The Center for Mouse Genome Modification (CMGM) is now offering genome editing services using recombinant adeno-associated viruses (rAAV).
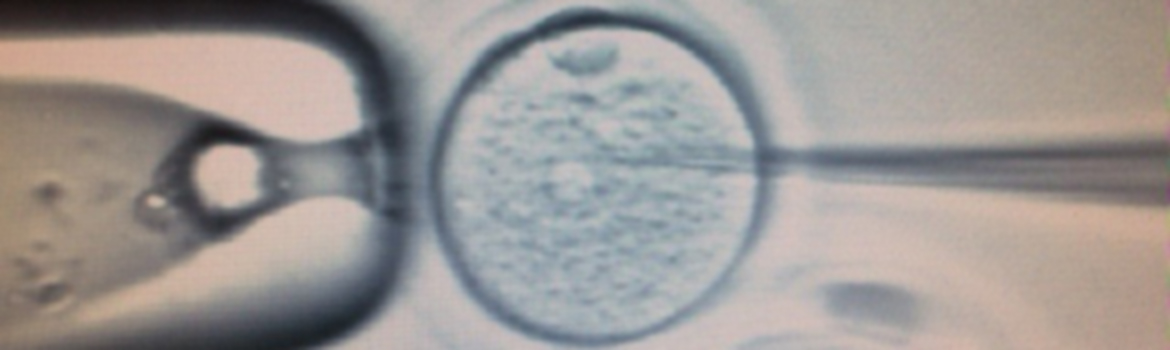
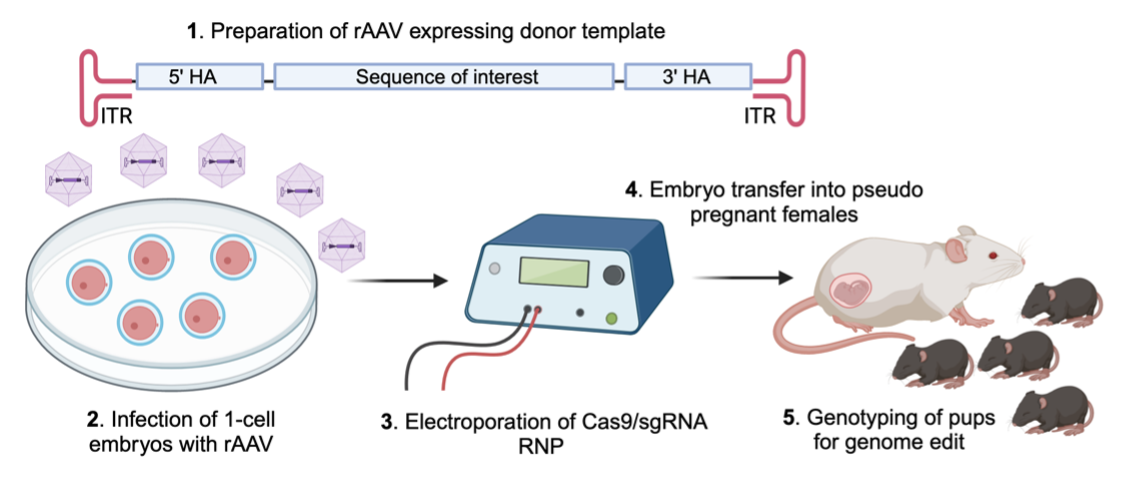
AAV (adeno-associated virus), which is a single-stranded DNA (ssDNA) virus, can effectively penetrate the zona pellucida and infect one-cell embryos. Recombinant AAV (rAAV) contains the sequence of interest together with 5’- and 3’-homology arms for CRISPR-mediated gene editing in the mouse genome. To this end, we infect one-cell embryos with rAAV followed by electroporation of with Cas9/sgRNA ribonucleoprotein (RNP) for subsequent genome modification in the mouse. The advantage of this approach is that rAAV infection is faster and less laborious than traditional pronuclear microinjection to transduce ssDNA template into mouse embryos. Furthermore, ssDNA template in the form of rAAV genome is a more efficient template for homology-directed repair as compared to double-stranded DNA. This approach significantly increases the efficiency to generate novel mouse models containing the sequence of interest.
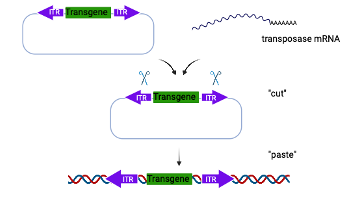
Piggy Bac mediated transgenesis
PiggyBac